Mustang Club of Maryland http://www.mustangclubofmd.com/phpbb/ |
|
68 Mustang Fastback restorations, my sons 1st car. http://www.mustangclubofmd.com/phpbb/viewtopic.php?f=26&t=3914 |
Page 1 of 19 |
Author: | Keepat [ Thu Nov 04, 2010 8:05 am ] |
Post subject: | 68 Mustang Fastback restorations, my sons 1st car. |
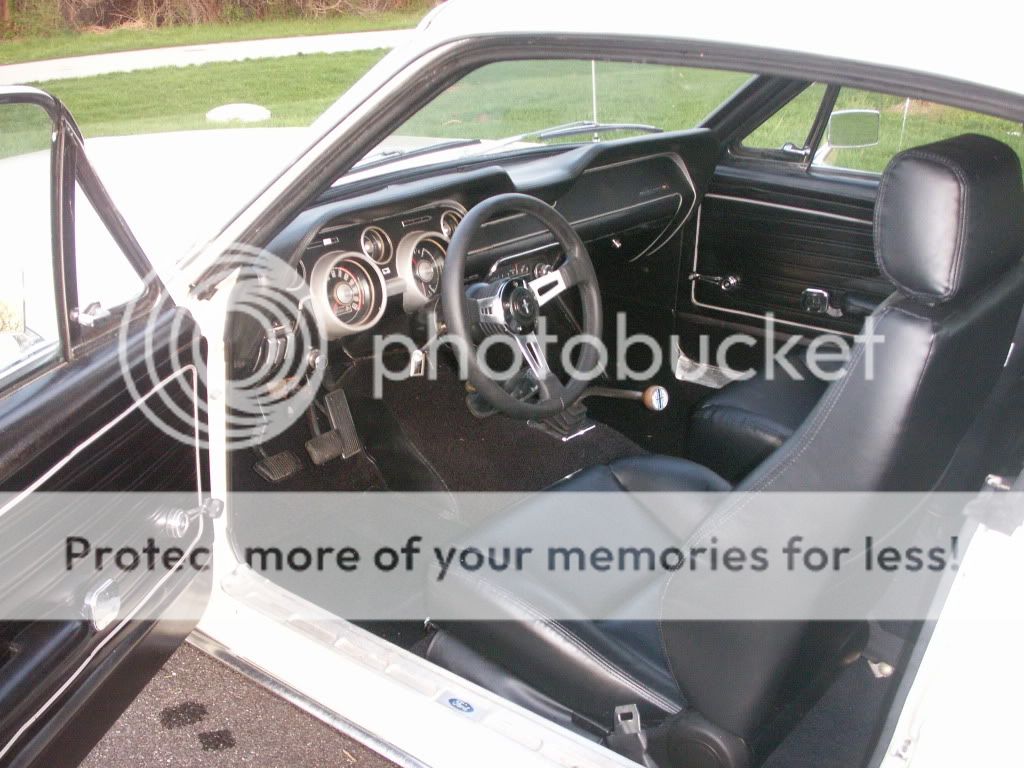
A few years ago my 14 year old son, Kurt and I when on the Power Tour, and along the way he fell in love with a red 69 mustang at one of the stops. After the Tour I had Kurt watch the movie Bullitt and then the hunt was on for a 68 Fastback and Highland Green was going to be the color! This past spring we found a 68 fastback that Kurt could afford and we just started the restoration last month. When we finish the car we will take it on the Power Tour. Pat ![]() Kurt the day he bought the car. ![]() ![]() ![]() ![]() |
Author: | Keepat [ Thu Nov 04, 2010 8:06 am ] |
Post subject: | |
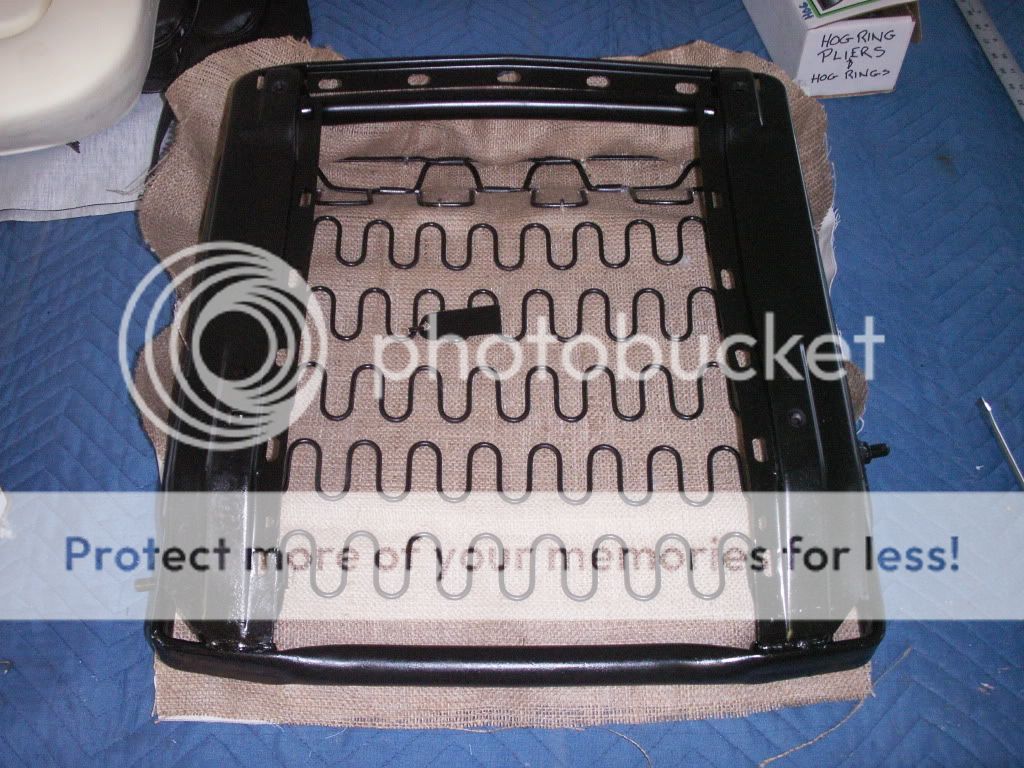
The first project was restoring the original front seats. The car had some aftermarket high back seat in it but also came with the original bucket seats. Kurt had some experience recovering seats as he has help me with a few of my cars over the years. ![]() ![]() ![]() ![]() ![]() ![]() ![]() We also restored the seat tracks. So much is available repro for Mustangs but with Kurt’s limited funds we are restoring the parts we can as to save the $$ for the cool stuff! Pat |
Author: | Keepat [ Thu Nov 04, 2010 8:07 am ] |
Post subject: | |
I rented a small shop just up the street from our home so we would have a place to do the body work and paint the car ourselves. ![]() ![]() ![]() ![]() Picked up a new hood at Carlisle for $168.00 and it fit great! ![]() ![]() ![]() ![]() ![]() ![]() ![]() ![]() |
Author: | Red Baron [ Thu Nov 04, 2010 1:49 pm ] |
Post subject: | |
Hi Pat, You and Kurt should be very proud of the work you've done with this 1968 Mustang. The seats came came out great! The car looked pretty good in the pictures, no body damage, fairly clean engine compartment, nice interior so the restoration should be a lot easier than to have do all of these things on a car not as well taken care of. Are you planning to rebuild the engine or transmission? Are you keeping the color the same or going with a dark green like in Bullit? Kurt is really learning a lot from this restoration which will last him a lifetime in memories! Midnight Blue MCOM Historian |
Author: | Keepat [ Thu Nov 04, 2010 5:44 pm ] |
Post subject: | |
Author: | gtvert01 [ Fri Nov 05, 2010 8:17 am ] |
Post subject: | |
Author: | Rick Hinkle [ Thu Nov 11, 2010 8:58 pm ] | ||||
Post subject: | |||||
Awesome!! I thought my son was the only young-un getting into restoring these musclecars! Brian is now 17 and working on his 69 Charger whenever he gets the chance. He helped me a lot over the years with my 67 Shelby and others and he's hooked, too! Congrats!! Great Work!!
|
Author: | Red Baron [ Fri Nov 12, 2010 9:04 am ] |
Post subject: | |
Author: | Rick Hinkle [ Fri Nov 12, 2010 10:05 am ] |
Post subject: | |
Author: | Red Baron [ Fri Nov 12, 2010 4:24 pm ] |
Post subject: | |
Author: | Keepat [ Tue Nov 16, 2010 7:56 pm ] |
Post subject: | |
Kurt & I are still disassembling the car just a little slower as Kurt’s school work has been heavy. He showed me his report card today with 5 A’s and 1 B for a 4.06 gpa. Cost me $100.00 but he is putting the money in the car! I call that a win win! Thanks! Pat ![]() ![]() ![]() Who makes/sells the gasket for the quarter vent air box??? ![]() ![]() ![]() Here you can see the original light green color as this was the 1st time the quarter vent have been off ![]() |
Author: | Red Baron [ Tue Nov 16, 2010 8:20 pm ] |
Post subject: | |
Looks like you got your money's worth Pat! That's some report card! ![]() Midnight Blue |
Author: | gtvert01 [ Thu Nov 18, 2010 8:50 am ] |
Post subject: | |
Looks like it might be a Seafoam Green car. Is the paint code "O"? That is the same as my coupe. Not sure if you'll paint it that color as it is not a flashy color but I love it because it is different. |
Author: | Keepat [ Thu Nov 18, 2010 7:02 pm ] |
Post subject: | |
Author: | Keepat [ Thu Nov 18, 2010 7:02 pm ] |
Post subject: | |
Here are a few pictures of the quarter vent air box before & after. ![]() ![]() ![]() Small repair with 5 minute epoxy. ![]() Re-caulked the inside with black seam sealer ![]() ![]() ![]() ![]() All the part cleaned up great and I used satin clear coat to bring the gray color of the box out. I was also able to reuse the rubber gasket ( have yet to find anyone who makes a new gasket) Thanks! Pat |
Author: | ssp mustang [ Fri Nov 26, 2010 9:59 pm ] |
Post subject: | |
Looks good!!! ![]() |
Author: | Keepat [ Mon Nov 29, 2010 10:18 am ] |
Post subject: | |
Kurt & I cut out two rust holes in the right side shock tower. They rusted where the aprons are pinched welded on. Then we cut some 16 gauge patches, using the old cut outs for templates. Then it was time for Kurt’s 1st welding job! Thanks! Pat ![]() ![]() ![]() ![]() A little hammer & dolly work ![]() ![]() ![]() Not bad for his 1st time! After a little grinding it will look great! |
Author: | Keepat [ Wed Dec 01, 2010 2:18 pm ] |
Post subject: | |
We finish the repair to the right side aft apron and tried our new pinch welder. The pinch welder worked great just need to preset the timer as to get the right weld. Pat ![]() ![]() ![]() ![]() ![]() ![]() |
Author: | Keepat [ Wed Dec 08, 2010 8:59 pm ] |
Post subject: | |
The cowl vent on Kurt’s car looks great and just has some light surface rust. To get better access we cut an oval hole on the side that we will weld closed after we treat the surface rust. ![]() We used a 1” hole-saw for the hole in a place that is covered by the fender. We could make a plate and just caulk & screw it in, but we weld it in, and treat the new metal from the inside vent hole. ![]() ![]() ![]() I used a snake camera to get a better view ![]() After sanding, scraping, cleaning, and prepping, I use Eastwoods frame coating with a cool 360 degree spray nozzle on the end of a 2’ hose to seal the metal with zinc phosphate. Also use a long handle ½” brush get to all surfaces. ![]() ![]() ![]() We will finish it with a coat of PR15 this weekend. Thanks! Pat |
Author: | Keepat [ Mon Dec 13, 2010 12:13 am ] |
Post subject: | |
We did some more welding on the frontend this weekend and cut the vin # out of the right side inter fender and welded it into the replacement apron. Thanks! Pat ![]() ![]() ![]() We used some copper on the top and bottom to protect the numbers, cool the metal, and stop the weld through ![]() ![]() ![]() A lot of work and after the fender is on the only place you can see the # is if you look inside the wheel well. ![]() |
Page 1 of 19 | All times are UTC - 5 hours [ DST ] |
Powered by phpBB © 2000, 2002, 2005, 2007 phpBB Group http://www.phpbb.com/ |